Adding a News Article to your Site
This article provides information on the posts section of your dashboard and a tutorial on how to add news posts to your website. Have a look at the quicklinks below to jump to a specific section.
Quicklinks
- TLDR
- Overview of Posts Dashboard
- Screen Options
- Post Field Descriptions
- Best Practices for Posting
- Visual vs Text Editor
TLDR – Too Long, Didn’t Read
- Login to your dashboard.
- Click “posts” on the left-hand side menu.
- Click “Add New”.
- Fill out the Title and text editor with your new content.
- Choose a category to house your news posts (the default is “latest news”).
- Upload a featured image to accompany your news post.
- Click “Set featured Image”, Select your image or Drop files onto the window.
- Fill out “URL”, “Title”, “Caption” and “Alt Text”.
- Click “Set Featured Image”.
- Once you’re happy with the way your post is looking, don’t forget to click “Publish”.
Overview of Posts Dashboard
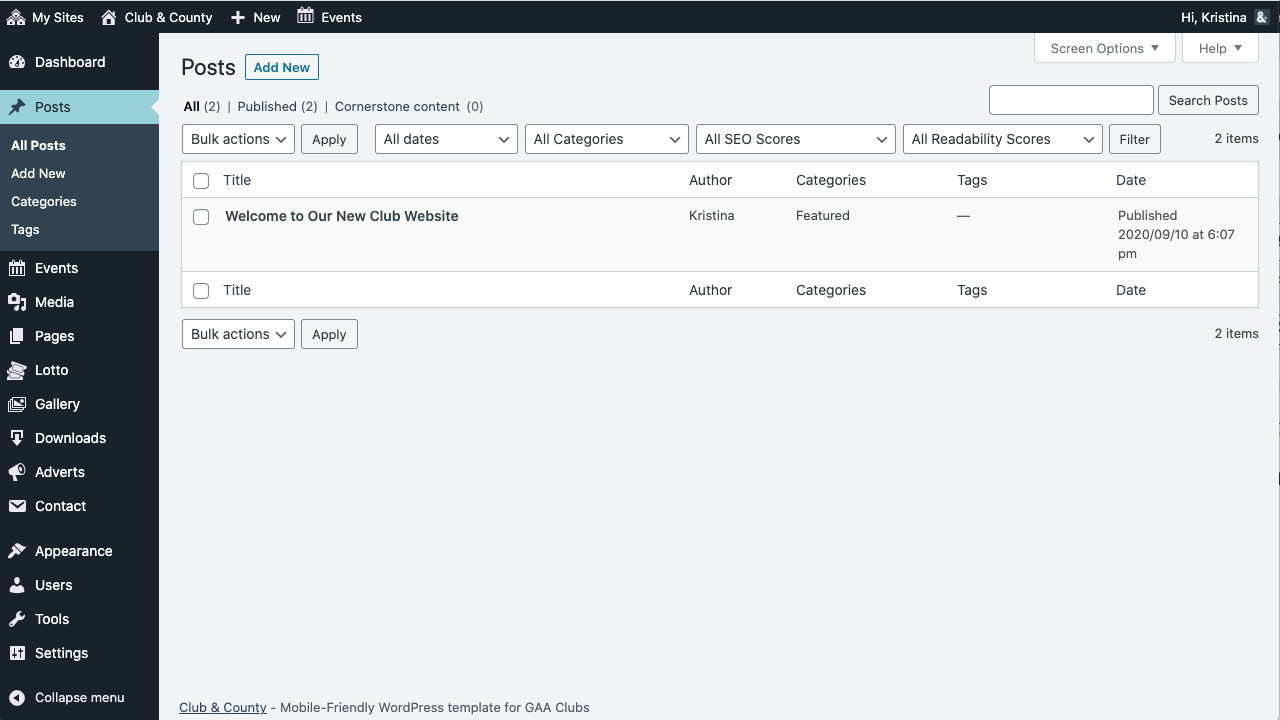
Posts Dashboard – Click to Enlarge
The posts section is one of the most important areas of your website, allowing you to keep your club members up-to-date with all that is going on in your Club.
This is where you will see a list of your news posts, in chronological order. From here you can choose to:
- Add a new post
- Edit an existing post
- Delete an existing post
- Search for a specific post
- Filter posts by date published, category, SEO score, Readability Score
Screen Options
Firstly, we need to make sure that you’re actually seeing the fields/areas that we’re talking about in our tutorials. To do this please click on the “Screen Options” tab on the top right of your screen, just below your name.
From here you can switch on/off the different areas of your screen by unchecking the boxes. We recommend having at least the following items checked:
- Revisions – will display under the Body Copy Box by default
- Excerpt – will display under the Body Copy Box by default
- Slug – will display under the Body Copy Box by default
- Categories – will display in the second column on the right by default
- Tags – will display in the second column on the right by default
- Featured Image – will display in the second column on the right by default
If you don’t see these boxes in the area specified above, it may have been accidentally moved as they can be moved via click and drag.
Post Field Descriptions
It may look daunting at first, but each of the fields in the news post editor is important and useful when it comes to writing content for your site. I’ve explained each area a little below:
Title/Headline Box
This is where you add the title of your post. Keep it short and sweet, no more than 7/8 words, and try to keep it unique. Search engines don’t like to find duplicate content on your site and will penalise you for this.
Permalink
This is the link that the user will see when they view your post. You can change it, but unless you need a custom URL the system will automatically generate a permalink based on what you entered in the Title/Headline Box.
Body Copy Box
This is where you enter the main body of your post content. You can add links, images, links to images, and any information you want to display on your site in either a Visual or text-based way, more on that below.
Publish Box
This box holds the main controls of your post. You can publish, schedule or save your draft post from here.
Preview Button – This allows you to view the post before publishing.
Save Draft – This allows you to save your post as a draft rather than immediately publishing it.
Status – This allows you to choose how you want to save your post; as a draft or pending review (depending on your user role capabilities you may not be able to publish a post without an admin reviewing it).
Visibility – This determines how your post appears to the world (click Edit next to Visibility). Public posts will be visible to all website visitors once published. Password Protected posts can be viewed by those visitors that have been given the password to view the content. Private posts are visible only to you (and to other editors or admins within your site).
Revisions – Click Browse to see all of the changes you’ve made to your post – an invaluable tool if you accidentally overwrite your content, something I would have loved as I sit and write this article for the second time (I forgot to switch on revisions!!!)
Scheduling – You can also choose to publish something in the future on a specific date/time, maybe on a weekend when you’re not going to have access to the website. You can also backdate posts so that it appears correctly in the news archive timeline.
Categories Box
The general topic of the post. It is typical for a blog to have 7-10 categories for content. Readers can browse specific categories to see all posts in the category. By default, you will have 2 categories on your site, Latest News and Featured. These have different purposes.
Featured – If you choose Featured your news posts will appear on the rotating news carousel at the top of the homepage. It will only show the most recent 3 Featured posts here and then everything else will filter down into Latest News.
Latest News – The Latest News category (and any other category you create) will appear in the latest news section of the homepage. Only the most recent 6 posts that qualify will appear here. Everything else will then be accessible via the news page, which acts as an archive for older posts.
Tags Box
These are micro-categories for the post, similar to above but you can have quite a few more tags associated with a post.
Excerpt
The post excerpt is a short preview paragraph of your news post. By default, your website will choose the first 55 characters, but it will always look better if you define your own post excerpt.
Post Author
A list of all the blog authors that you can select from to attribute as the author of the post. This section only shows if you have multiple users with authoring rights in your blog. The author name will display in the header and footer of each news post so make sure that your information is correct!
Best Practices
It’s not just about copying and pasting your content into the text editor. You need to take the time to properly format your post to give the user the best experience possible. We’ve compiled some tips on how to make the most of your news posts:
- Don’t use the same title over and over. This is bad for Search Engine Optimisation (SEO). If you have multiple posts on a specific topic, create a new category to keep these together.
- Instead of making titles bold, use a heading tag instead – heading 2, heading 3.
- Got a long post? Split it up into paragraphs to make it easier for users to read by double-clicking enter. Add some headings in there too for good measure!
- We recommend that you set a unique featured image with each post you publish, otherwise the system will set a default image. Sometimes this is ideal, other times the default image may not be relevant.
- If you’ve already set your featured image, this will automatically appear at the top of the news post so there is no need to add it again to the body of the text. This will result in duplicate images which are unnecessary.
- We’ve added special formatting to your news posts so you can start your post with an introductory paragraph; 2/3 lines of text before you start adding your headings.
For some more in depth tips on how to format a news post, please have a look at our article specifying 3 way to improve your news posts.
Visual vs Text Editor
Depending on your preference, you may want to use the visual editor to add your news content. This allows you to effectively see how your post will look on the front end once it’s published. We recommend using this if you’re not familiar with HTML.
If you are a coder, then you also have the option to add basic HTML into the text editor of the site. Please limit the use of inline css as this can conflict with the default styling of the site.